Dev Log 8 – The Last Vagabonds

Slow Progress

I had less progress than expected in the last three months since the job hunt took more time per day than expected. Furthermore, I underestimated the effort for level design and environmental art. That doesn’t mean that nothing happened. The story is finished, including dialogues. The essential parts of the maps are done. I added a quest/mission system and also added the necessary quests. The basic save/loading system is working. The final characters are finished as well as the weapons. The melee gameplay got polished, as well as the looting system. The steam page of The Last Vagabonds also went online 🙂

Level Design

Filling an empty space is easier said than done. Although my game plays in the known world, it was tough to create a believable map even without considering any level design. So after some trial & error and some books and youtube videos, I got something usable, but I had to accept that it would be far from perfect since I am doing it alone. It’s not my expertise, and time is quite a limiting factor for me. I will show you my final process.

I started with a bubble diagram. I took this idea from this video (18:50 bubble diagram). You abstract the area in bubbles where each bubble has its purpose, e.g., tutorial bubble.

After that, I started a rough map sketch and tried to grey-box it. That’s when I realized that creating cities takes a lot of work. There are city generators, but they did not match my bubbles. My final approach was to copy some parts from cities in google maps or, in my case, from Berlin. 

Then I started grey boxing, primarily based on this video. So I created grey box assets based on my asset pack and filled the world with them. The final result looked like shit, but it served its purpose. I could test how long it will take to finish the game and if each area can serve its “bubble purpose,” e.g., tutorial, mission 1, etc.

Finally, I replaced the grey box assets with the final assets. I still have to add foliage and improve the lighting.

Characters

I just checked that the clothing is believable for a person in a post-apocalyptic scenario and that the colors somehow match.

Load/Save

I wrote at the beginning my own save system, which also worked—my most helpful resources were the official unreal documentation and this tutorial. This asset was on sale during black Friday, so I decided to replace my saving system with this. It seems to be used by plenty of satisfied people, so it should be pretty stable. It’s still maintained; therefore, I should have fewer issues with bugs in the future.

Sound and Music

This was the most annoying part since you can’t scale it. One day I just listened to gore sounds. Another day to zombie sounds, and then I looked for theme and UI sounds.

Unreal Engine 5.1

The update just broke the splitscreen functionality. So I looked into the Lyra project from Epic and found how they solve it. I replaced the part with their code and was ready to go.

Mission System

A little to tell about the mission system: I just needed a widget that displays the current mission and some functionalities to add follow-up missions. This was relatively straight forward.

Steam Page for The Last Vagabonds

I created my steam page based on this GDC video. It tells you which tags to use, which images, what kind of videos, and what the description should look like. Creating the steam page is relatively easy. Steam provides you with a checklist and some templates. My page is not entirely done yet, but it’s a good foundation for the beginning. I created the logos and images by myself.

You can’t just release your game. Publishing the page takes at least 2-3d if they don’t find any issues. I had to go through this process twice because some of my images needed to be corrected.

Then you have to wait two weeks before you can release your game.

Next Steps

The following steps will be a lot of polishing. Then I will get some playtesters, adjust the game based on their feedback, and hopefully find most bugs. I hope to release the game end of January or the beginning of February. Since I will start my new job in January, I just will be able to spend the weekends on this game.

Unreal Engine 5 – Physical Animation

Overview


I will show you how to use simple Physical Animation in Unreal Engine 5. We start with the minimal required setup and add some simple features step by step. I will use Blueprints for this tutorial since it’s easier to copy and paste the code.

Setup

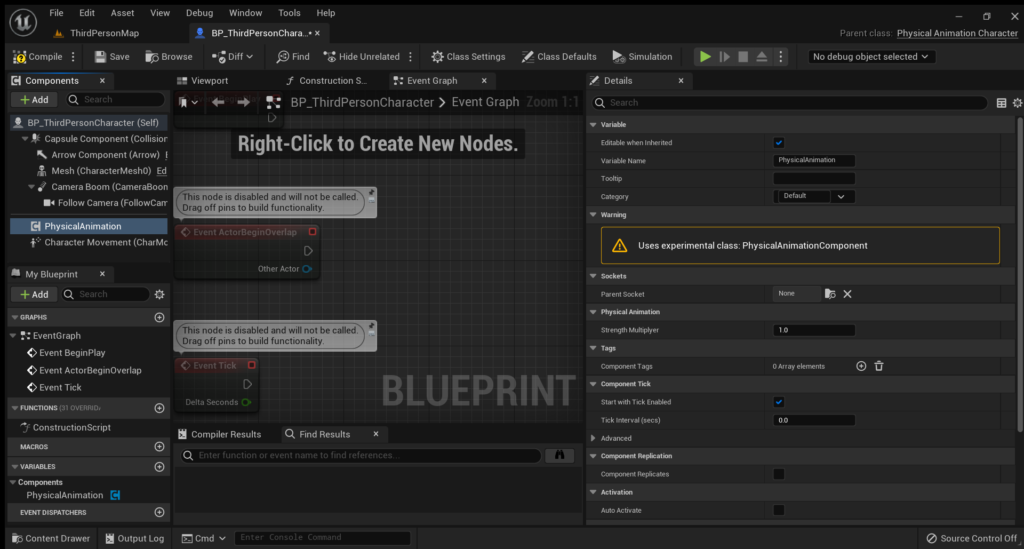
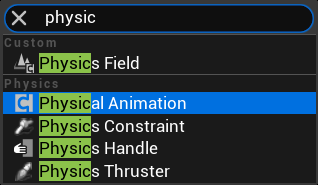
Create the Third-Person sample as a C++ or Blueprint-only project. Open the BP_ThirdPersonCharacter Blueprint and add the PhysicalAnimation component to the character.

Delete the “Event Tick” and “Begin Play” Event. Now copy & paste the Blueprint from below. The variables should contain the following values.

BoneNamePelvis
Physics Blend Weight1.0
ShouldBlendBackfalse

The simulation will be applied to all bones below the bone name. Below means, all bones attached as children to the named bone in the skeletal mesh asset. The pelvis is, in this example, the root bone. One can select to include or exclude the named bone. In this example, we exclude the pelvis bone.

It should now look like this, and you could stop the tutorial here and just explore the provided Blueprint.

Physical Animation Settings

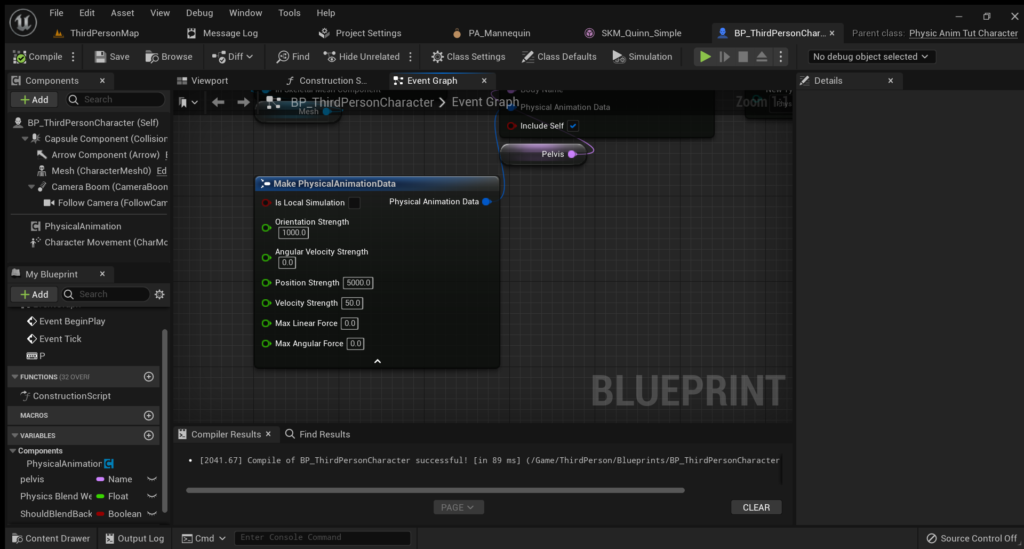
As the next step, we can add Physical Animation Settings. The settings will be applied to the physical asset of the character. You can find the asset by selecting the character mesh and searching under details for the physical asset. This allows us to control the physical behavior of the character. The snippet should also be available in the Blueprint from above.

Let’s have a look at the values.
Is Local Simulation
Decides if the drive targets are in local or world space. The values “Position Strength” and “Velocity Strength” are just considered in world space.
Orientation Strength
Strength to keep the orientation of the underlying animation.
Angular Velocity Strength
Strength to keep the angular velocity of the underlying animation.
Position Strength
Strength to keep the position of the underlying animation.
Velocity Strength
Strength to keep the velocity of the underlying animation.

Epic suggests the values 1000, 100, 1000, and 100, but this didn’t work for me. I use different weights, and it also depends on your desired effect.

I use the local simulation to display impacts. The global one could be handy for environmental interactions, but I am currently not using it. The video below shows the environmental impact.

Physical Animation Profile

Let’s say you need different animation settings. A sword’s impact should behave differently from a bullet’s. That’s where Animation Profiles come in handy.
First you have to create a profile.
There is a snippet in the blueprint above how to use it.

Constraints Profile

Constraints are necessary to define how far each bone can move. For example, the right hand should not reach the right elbow. We use in this example the predefined constraints from the UE5 mannequin. Similar to the physical animation profile, a code snippet is provided in the Blueprint above. Here is the documentation how to create a constraints profile.

Physics Blend Weight

By using the Physics Blend Weight, we can control how much impact the physical simulation has on the animation. This is, for example, handy if we want to stop the simulation. Instead of snapping back, we can interpolate back to the “default” position. An example is provided in the Blueprint above.

Adding Impulse

While simulating the body, we can add impulses to bones to simulate impacts. This is straight forward, and an example is provided in the Blueprint above.

C++

The C++ part could look, for example, like this. And as written, this is an example code, I would not use it like this in any project, but it should be enough to get an idea of how it works.

YourCharacter::YourCharacter(const FObjectInitializer& ObjectInitializer)
: Super(ObjectInitializer)
{
        // member variable
	PhysicalAnimationComponent = CreateDefaultSubobject<UPhysicalAnimationComponent>("PhysicalAnimComp");

}

void YourCharacter::PhysicHit()
{	
	PhysicalAnimationComponent->SetSkeletalMeshComponent(CharacterMesh);
	PhysicalAnimationComponent->ApplyPhysicalAnimationProfileBelow("pelvis", "Profile", false);

	GetMesh()->SetCollisionEnabled(ECollisionEnabled::QueryAndPhysics);
	GetMesh()->SetAllBodiesBelowSimulatePhysics("pelvis", true, false);

	auto const Impulse = GetActorForwardVector() * 1000.f;
	GetMesh()->AddImpulse(Impulse, "head", true);
        // member variables
	RemainingPhysicalAnimationTime = PhysicalAnimationTime;
	bIsPhysicalAnimationActive = true;
}

void YourCharacter::Tick(float DeltaSeconds)
{
	Super::Tick(DeltaSeconds);

	if (bIsPhysicalAnimationActive)
	{
		RemainingPhysicalAnimationTime = UKismetMathLibrary::FInterpTo(RemainingPhysicalAnimationTime, 0.f, DeltaSeconds, 1);
		RemainingPhysicalAnimationTime -= 0.02f;

		if (RemainingPhysicalAnimationTime <= 0.f)
		{
			RemainingPhysicalAnimationTime = 0.f;
			GetMesh()->SetSimulatePhysics(false);
			GetMesh()->SetCollisionEnabled(ECollisionEnabled::QueryOnly);
			GetMesh()->SetAllBodiesBelowSimulatePhysics("pelvis", false, false);
			bIsPhysicalAnimationActive = false;
		}
		else
		{
			GetMesh()->SetAllBodiesBelowPhysicsBlendWeight("pelvis", UKismetMathLibrary::FMin(1, RemainingPhysicalAnimationTime), false, false);
		}
	}
}

Dev Log 7

Gameplay

I implemented 1vsN combat and fixed occurring bugs. I bought a blood assets pack and implemented blood trails and blood decals on the floor. As fun as it is to create Niagara effects, it takes too much time. I can still use my gained knowledge to customize the effects.

Multiplayer

The majority of the time was spent on fixing replication issues. I realized that I didn’t understand it as deeply as I thought. It took me quite a while to wrap my head around it and to fix almost all the issues. The architecture also needed changes to be more manageable and maintainable with replication.
A test run via steam with a friend was successful, but he experienced some frame drops. This should not happen at all at this stage of development. There was sadly not enough time to find the cause. So it will need another round of investigation.

The most helpful resource for me regarding replication was the documentation from epic self, the unreal wiki, and this video.

Game Design

I found an environment asset I will use for the game. Some time was spent on developing the rough outline of the story. After that, I ordered Fiverr gigs to fledge it out. It should be done by the 8th of October. Looking forward to seeing the result and if it was worth it. The story should help later on with the level design.

Random Stuff


During my flights, I finished the book The Art of Game Design. I can thoroughly recommend it.
The last few days were not the most productive since I moved back home. There is now some other stuff I have to take care of, and jetlags are real^^.

Next Week

Next week I will focus on the menus. This means starting, saving, loading, and exiting the game and adding settings for graphics, audio, and input.